A New Chapter in Smart Customer Service: AI Agent
The AI Agent function now fully supports Web Chat and WhatsApp channels. Each interaction consumes only one AI point to achieve highly efficient automated service.
The launch of this mode aims to significantly reduce the tedious work of traditional flow-based Q&A development. On the web side, we can divide it into two core modes:
- Suggestion: The AI does not intervene in the conversation directly but acts as an auxiliary role, providing suggested search items or replies in the chat room for visitors to choose from.
- Auto-Reply: The AI transforms into a frontline customer service agent, directly responding accurately to visitors’ questions.
It is worth mentioning that regardless of which mode is chosen, the system has a smart detection mechanism. Once a human agent comes online, the system will notify immediately; if the AI cannot identify the visitor’s intent, it will also issue a notification requesting support. In terms of the agent assignment mechanism, the system uses automatic load balancing technology to automatically assign conversations to the most suitable agent based on the current number of unclosed chat windows.
Supported Input Formats
To meet the needs of different scenarios, the supported input formats for each channel are as follows:
- Web: Currently mainly supports text input.
- WhatsApp: Supports text, image, and voice messages. Voice files are recommended to be under one minute, and file size under 5MB for smooth processing.
How to Enable
To start using this powerful feature, please go to the “Domain” settings page and enable the function modules you need.
Doc QA: Bringing Knowledge Base to Life
This is the most intuitive and easiest way to build. You only need to upload existing files, and the AI can extract knowledge from them.
Regarding the Web Crawling (Sitemap) mode, there is one thing to note: the system defaults to crawling only “static web pages”. If you need to crawl a single “dynamic web page”, due to recent version updates, the crawler’s User-Agent defaults to DMflowBot. This means the crawling behavior will strictly follow the target website’s robots.txt rules.
Important: If your website uses Cloudflare and has WAF (Web Application Firewall) enabled, please be sure to temporarily disable WAF or allow DMflowBot in the whitelist to ensure the indexing process proceeds smoothly. Please focus on crawling web content that belongs to you.

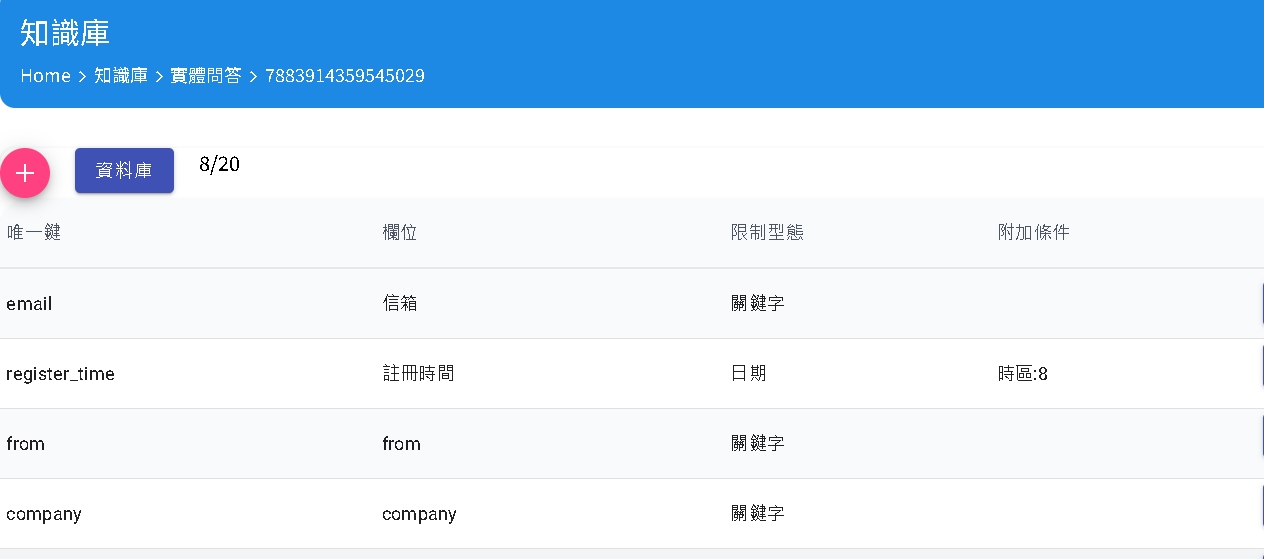
Form QA: Smart Application of Structured Data
The concept of Form QA is similar to database operations, but safer and easier to operate. You only need to set up the Schema first.
Since the DMflow product itself is positioned as an Adapter (converting SQL queries into internal system search methods) and does not directly operate on the underlying real database, you don’t need to worry about common security risks like SQL Injection.
Regarding permission control, using the AI Agent for data “Insert” is allowed (conversely, if inserting directly from the dashboard, corresponding permissions are required). However, regarding “Query” permissions, please be sure to configure them strictly. For detailed permission instructions, please refer to Form Permissions.
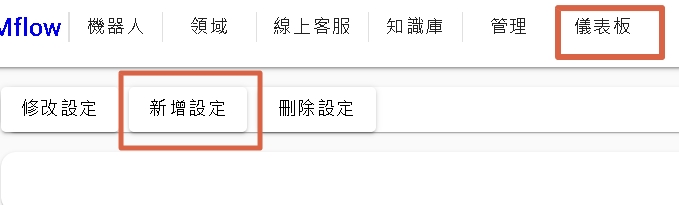
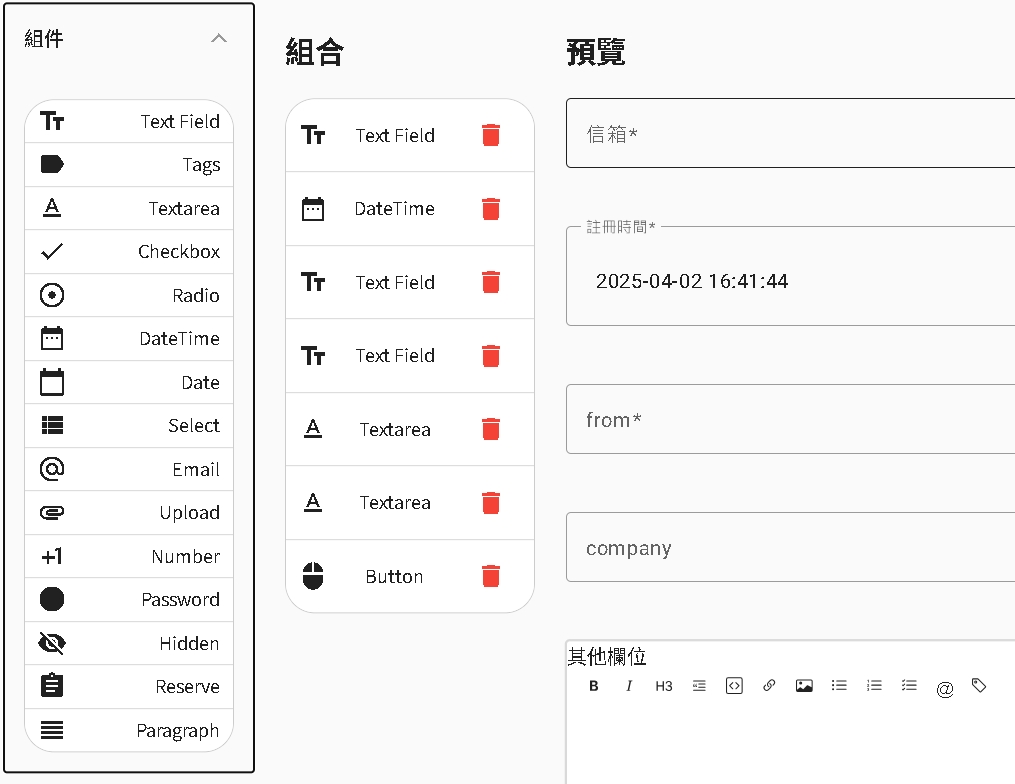
After completing the form design, please go to the dashboard for “Add Settings”. When the bot executes the action of adding data, it will proceed according to your settings here; if not specially set, the system will automatically judge based on field attributes.

** The new version provides a draggable Flex form adjustment, which can be sent to customers to fill out directly, allowing for better-looking form designs **
After clicking “Add Settings”, you can customize attributes like default values and required items. Note that the “Upload” function currently only supports operation via the UI interface and does not yet support file upload via the chatbot.
If you wish to trigger a specific Workflow after adding data, please configure it in the Button settings. For detailed tutorials on triggers, please refer to DMflow Form QA Tutorial or the Trigger documentation.
Chat Role: Giving AI a Personality
Finally, don’t forget to go and set up your “Chat Role”. For detailed setting methods, please refer to the Chat Role page.
Start Setting Up the Agent: Core Logic Configuration
Currently, the agent setting interface is mainly divided into three parts: Pre-condition Settings (filter user info), Intent Settings, and Response Settings.
Pre-condition Settings are mainly used to filter and judge user status, such as judging the user’s chat turns, or checking if the user has provided necessary information (e.g., whether email is filled, whether email is verified, etc.). However, the function to filter user information is not yet fully open.
This tutorial will focus on Intent Settings and Response Settings.
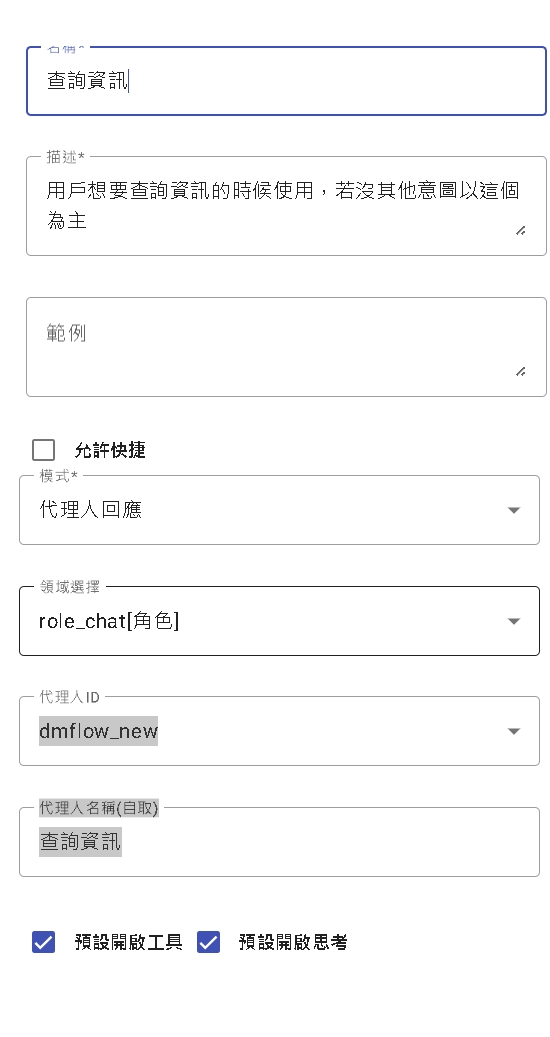
Intent Settings (Intent)
Intent judgment mainly relies on the description you provide. The current version will preload visitor information as a basis for judgment. Future plans include opening memory modules or allowing pre-calling of databases to make intent recognition more precise.
- Allow Shortcut: This is a convenient feature. When enabled, users can use
/plus the intent name, followed by a space and conversation content, to directly skip the intent recognition stage and forcibly trigger that intent.- Example:
/query_info I want to ask what your tax ID is
- Example:
Response Settings (Response)
There are two response modes:
- Direct Response: When a specific intent is recognized, the system directly sends the message content you pre-set.
- Agent Response: After hitting an intent, the system hands the conversation over to your designated “Chat Role” for a smart reply.
In the Agent Response settings, there are two key options:
| Item | Description |
|---|---|
| Default Open Tool | Forces the agent to attempt to call available tools before every response. |
| Default Open Thinking | The agent will first engage in logical thinking (Thinking), formulating a strategy before deciding whether to call tools or how to respond. |
Suggestions for “Thinking” mode prompts:
When you enable “Thinking” mode, it is recommended not to use role-playing instructions like “You are a…” in the prompt. Please write specific “Action Instructions” directly.
- Good Example: “Before adding user data, be sure to check if this user already exists.”
- Avoid Example: “You are a responsible data manager…”
Testing and Debugging
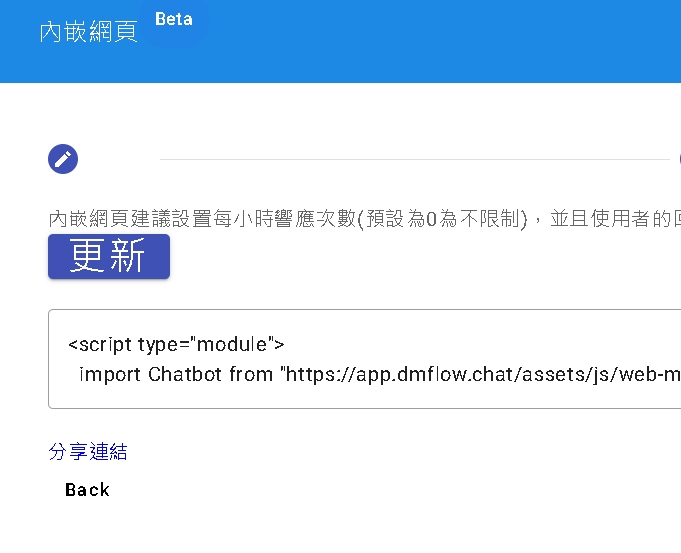
After setting up, please go to Settings -> Embedded Webpage for testing.
In this page, please pay attention to the following settings:
- Confirm “Share” is enabled.
- Confirm “Enable Embedded Webpage” is enabled.
- Add
https://share.dmflow.chatin “Domain Restrictions”.
After setting up, click the share link below to start testing.
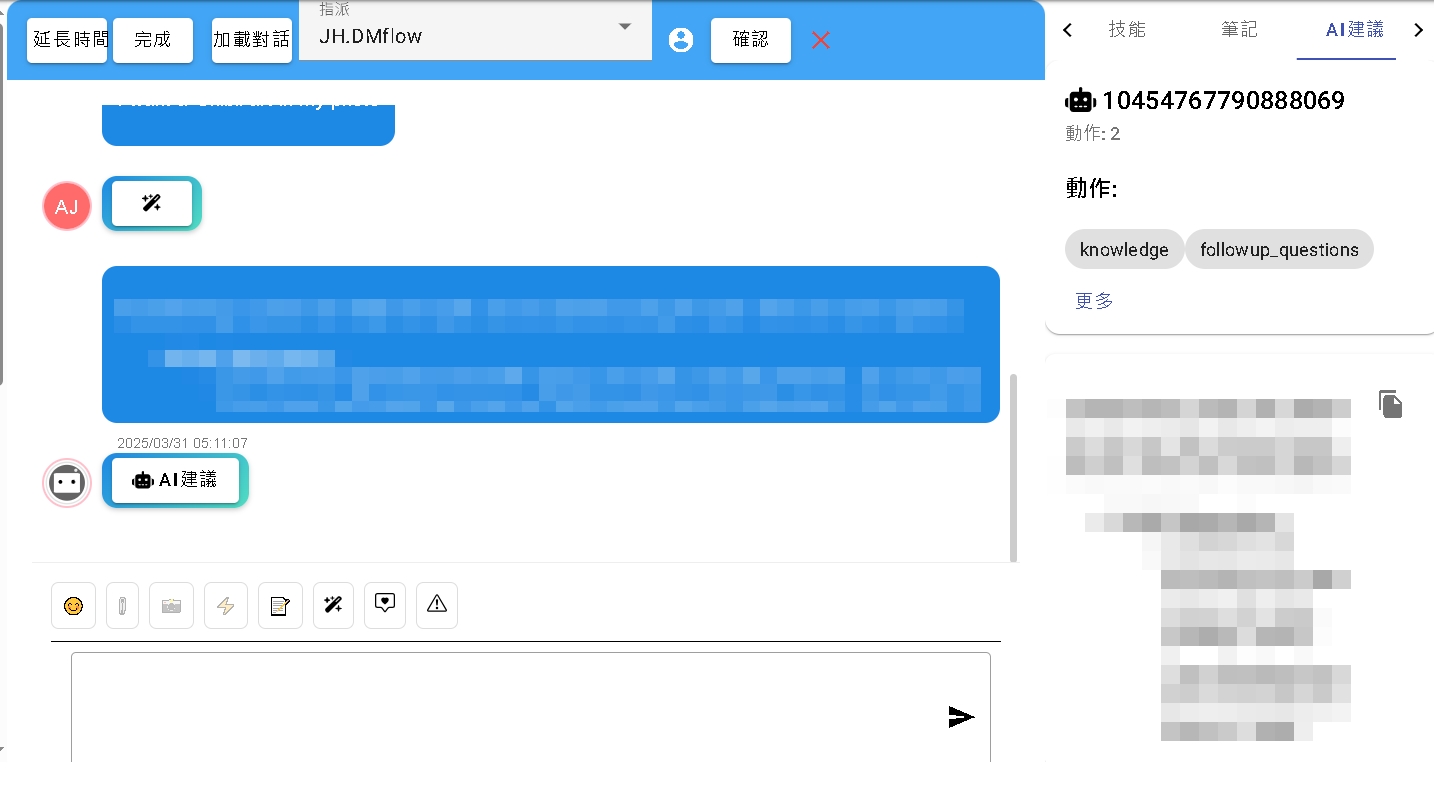
Test Interface Analysis
In the test interface, every AI conversation will fully display its internal operation logic, including:
- Thinking: The AI’s thinking process.
- Knowledge: Knowledge base retrieval and automatic extended queries.
- Followup_questions: Next conversation suggestions recommended to the user.
Feature highlights include:
- Form Insert: Can directly pop up a data insertion confirmation message.
- Form Search: Displays form content that the visitor has permission to query (currently does not support complex expressions like “not equal”). Click “More” to view complete data.
- Real-time Translation: The magic wand icon next to the visitor can translate the current conversation into your browser’s set language.
Conversation menu functions (from left to right):
- Emoji: Send emojis.
- Note: Add shared notes, supporting
@to call other agents. - Magic: Currently provides translation function. If the other party’s Locale value exists, it will default to converting to the other party’s language.
AI Translation Quota Explanation:
- Free Version: 10,000 characters per person per month.
- Lite Version: 100,000 characters per person per month.
- Character calculation is based on the number of input characters. For general customer service scenarios, this quota is usually quite sufficient.
We will add more detailed video tutorials later, so stay tuned.

