This guide will lead users step-by-step through the integration setup of WhatsApp Business API and dmflow.chat. This article not only provides operational steps but also deeply analyzes how to obtain a Permanent Access Token to ensure stable and uninterrupted chatbot operation. Through the self-configuration mode, enterprises can fully control data permissions and save extra communication costs.
As a giant in global messaging software, WhatsApp has long become an important bridge for communication between businesses and customers. For teams hoping to improve efficiency through automation, integrating WhatsApp into a chatbot platform is a necessary path. dmflow.chat has adopted a very pragmatic strategy: directly supporting Meta’s WhatsApp Business Platform.
What does this mean? Simply put, dmflow.chat chooses not to be a “middleman”. Users need to register and complete configuration in the Meta developer backend themselves. Although this requires a few more steps in the initial setup, the benefits are obvious: businesses have complete control over their WhatsApp accounts, and apart from the message fees charged by Meta itself, the chatbot platform will not charge an additional toll for each message. For businesses with large message volumes, this is a considerable cost saving in the long run.
Next, this guide will disassemble the entire configuration process, from the most basic account registration to obtaining the crucial “Permanent Token”, ensuring the bot can operate stably around the clock.
Why Choose Self-Configuration Mode? Balancing Data and Cost
Before starting technical settings, it is worth discussing the advantages of this architecture. Many platforms on the market use a managed mode, which although convenient, also means that the company’s communication data is in the hands of a third party, and is often accompanied by additional traffic surcharges.
The design logic of dmflow.chat is to let users master core assets.
- Data Control in Hand: All Access Tokens and configurations are managed by the user. This is like holding the keys to your own front door in your hand, rather than leaving them with the administrator.
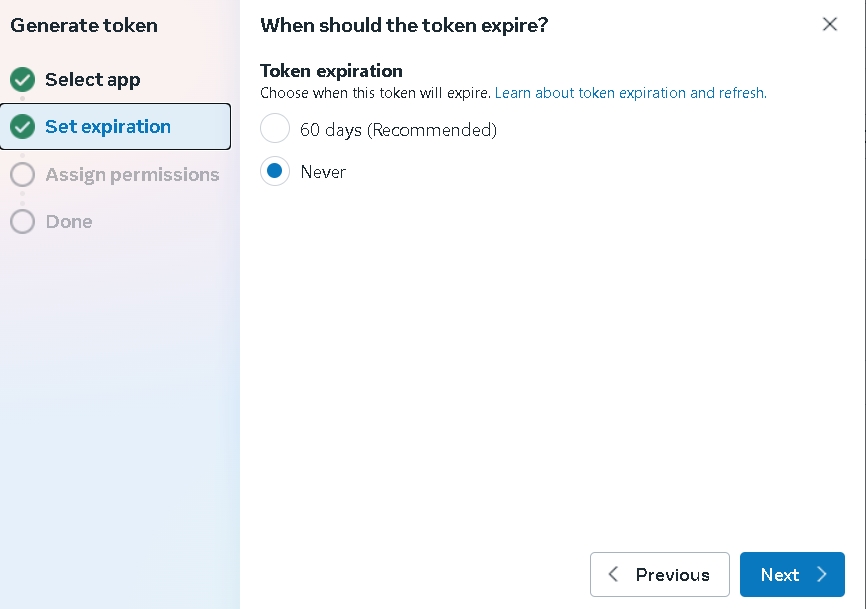
- Long-term Stability: By setting up “System Users” in Meta, you can obtain Permanent Tokens that do not expire. This is crucial because ordinary temporary tokens usually only have a 24-hour lifespan. If this problem is not addressed, the bot will go on “strike” the next day.
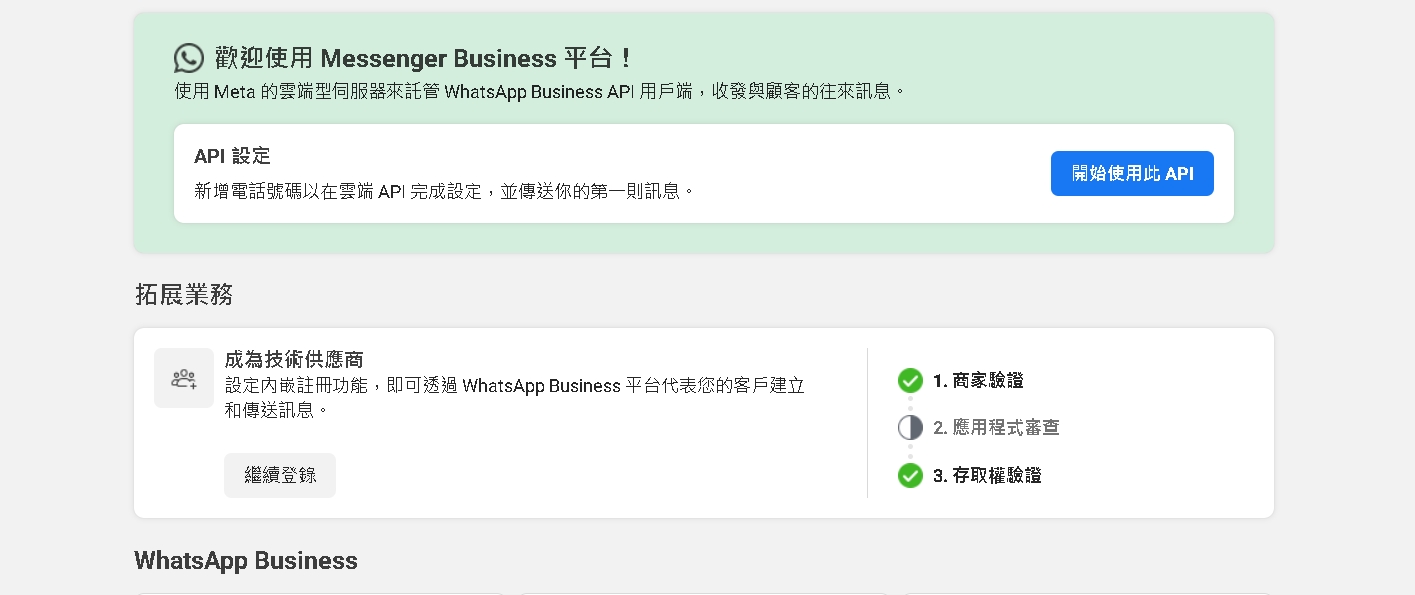
Phase 1: Basic Construction and Testing in Meta Developer Backend
Everything starts at Meta for Developers. The goal of this phase is to create an Application (App) and obtain basic credentials to communicate with WhatsApp.
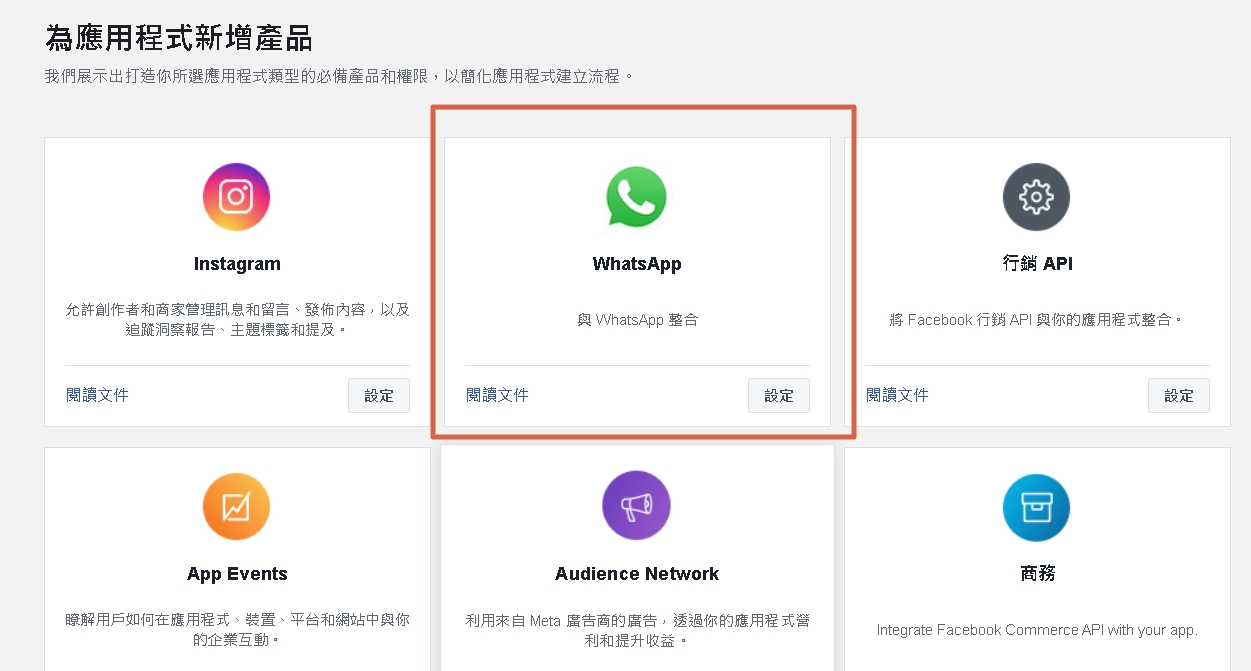
1. Create App and Add Product
First, enter the Meta developer backend and add a new application. In the application type selection, usually select “Business” type. After creation, find WhatsApp in the product list and click Settings. The system will then guide you through a series of configuration screens; basically, follow the interface instructions. This process is like installing a new App on a mobile phone, only this time it is done on the server side.

2. Initial Verification Using Test Number
Meta very thoughtfully provides a test environment. On the settings page, you will see a test phone number.
- Send Test Message: To confirm if the API is working, you must fill in your own mobile phone number (must be verified) in the “Recipient Phone Number” field.
- Confirm Receipt: After clicking send, if the phone receives a WhatsApp message, it means the line is connected.
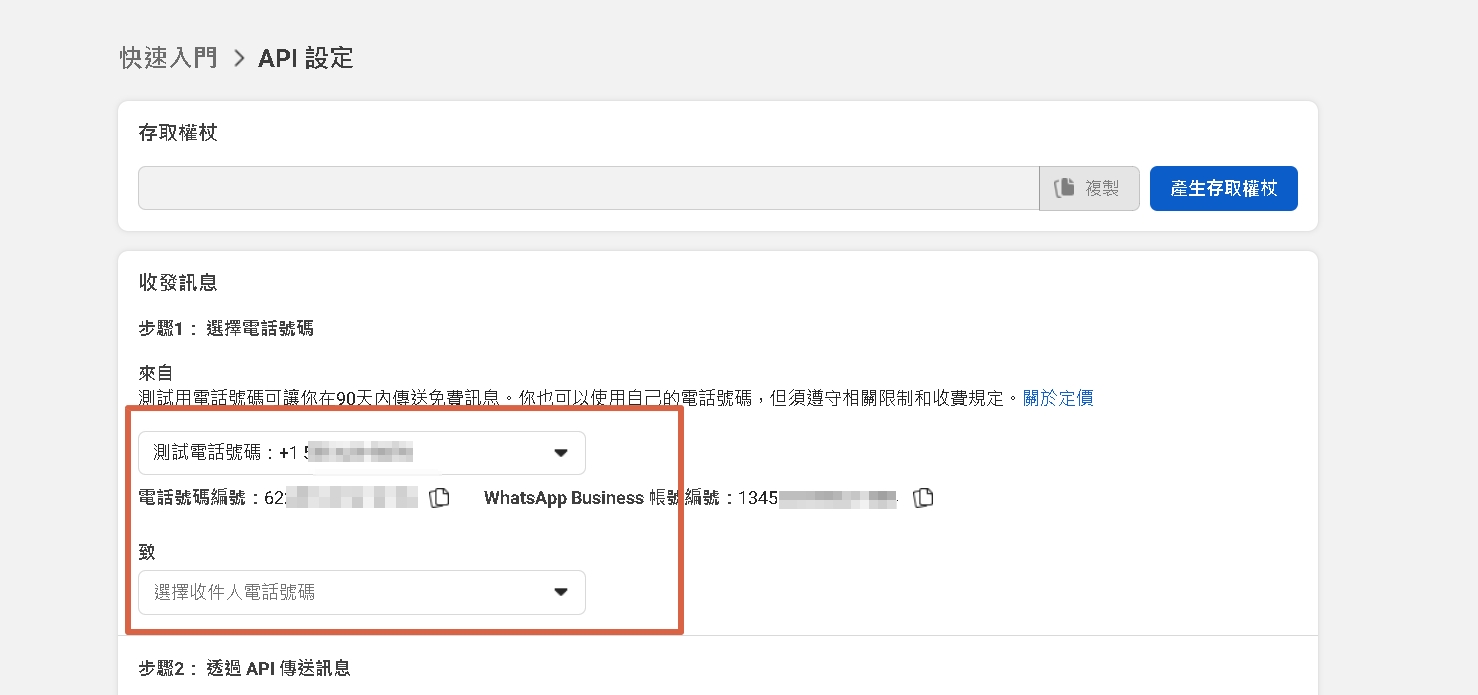
3. Record Key IDs
On the settings page, two sets of numbers are as important as ID numbers, please be sure to copy and save them properly:
- Phone Number ID: Represents the phone number sending the message.
- WhatsApp Business Account ID (WABA ID): Represents the account ID of the enterprise in the WhatsApp system.
Honestly, here is a pitfall novices often step into: The “Temporary Access Token” displayed on this page, although usable, only has a validity period of about 24 hours. Many developers use it directly after successful testing, only to find the bot broken the next day. To avoid this, you must enter the next phase: obtaining a permanent token.
Phase 2: Solving the Time Limit Problem, Obtaining Permanent Access Token
This is the core part of the entire tutorial. To allow dmflow.chat to continuously send messages on behalf of the enterprise, a “Permanent Pass” must be given. This needs to be achieved through the “System Users” function of Meta Business Suite.
1. Enter Business Manager Settings
Go to https://business.facebook.com/settings. There are many items managed here; please find “Users” in the left menu, and then click “System users”.
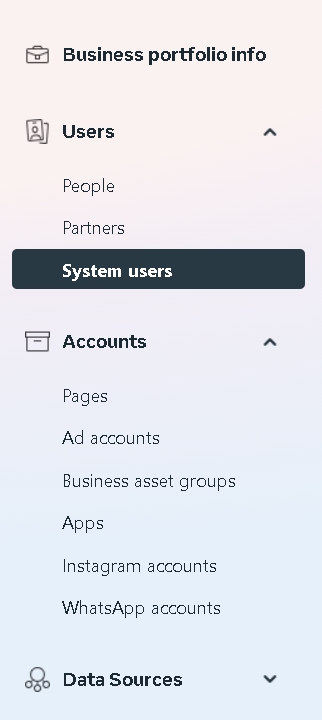
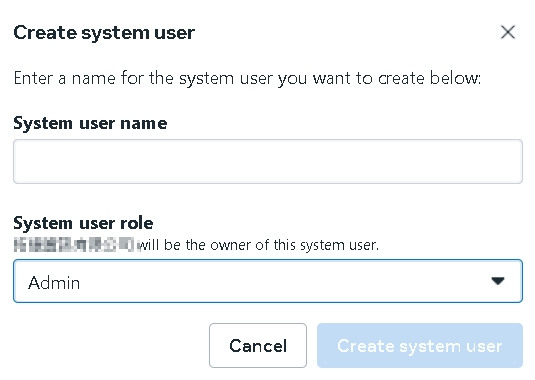
2. Add System User
A system user is not a real person, but a virtual account specifically for servers or software.
- Click “Add”.
- Naming and Role: Give this user a name (e.g.,
dmflow_bot), selectAdminorEmployeefor the role (Admin is usually recommended to ensure sufficient permissions for API operations).
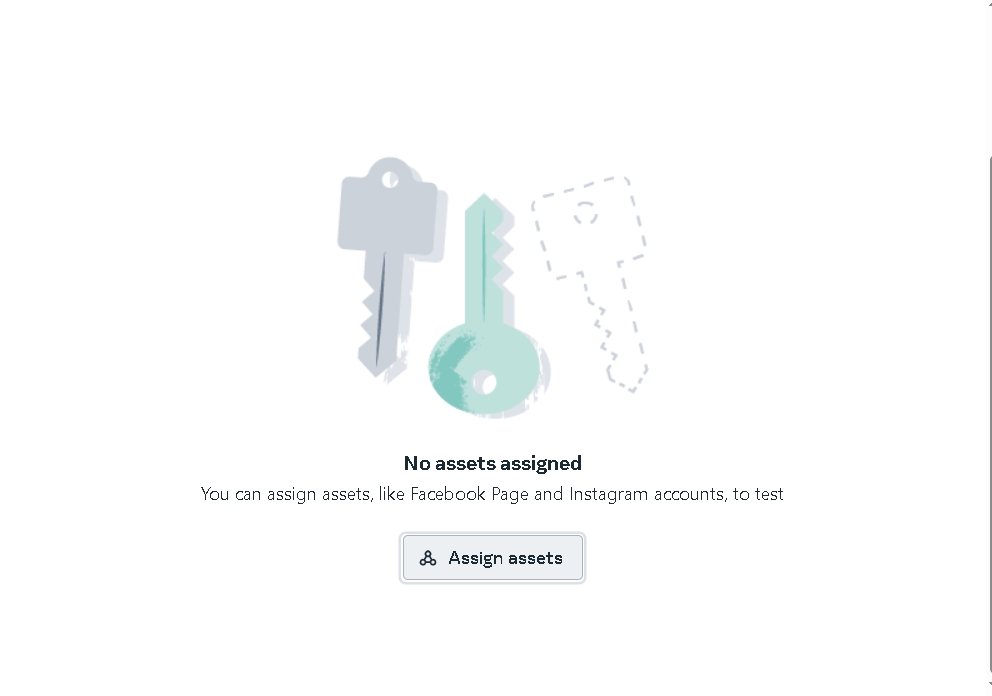
3. Assign Assets
This step is key to authorization. Creating a user is not enough; you must tell Meta which App this user can control.
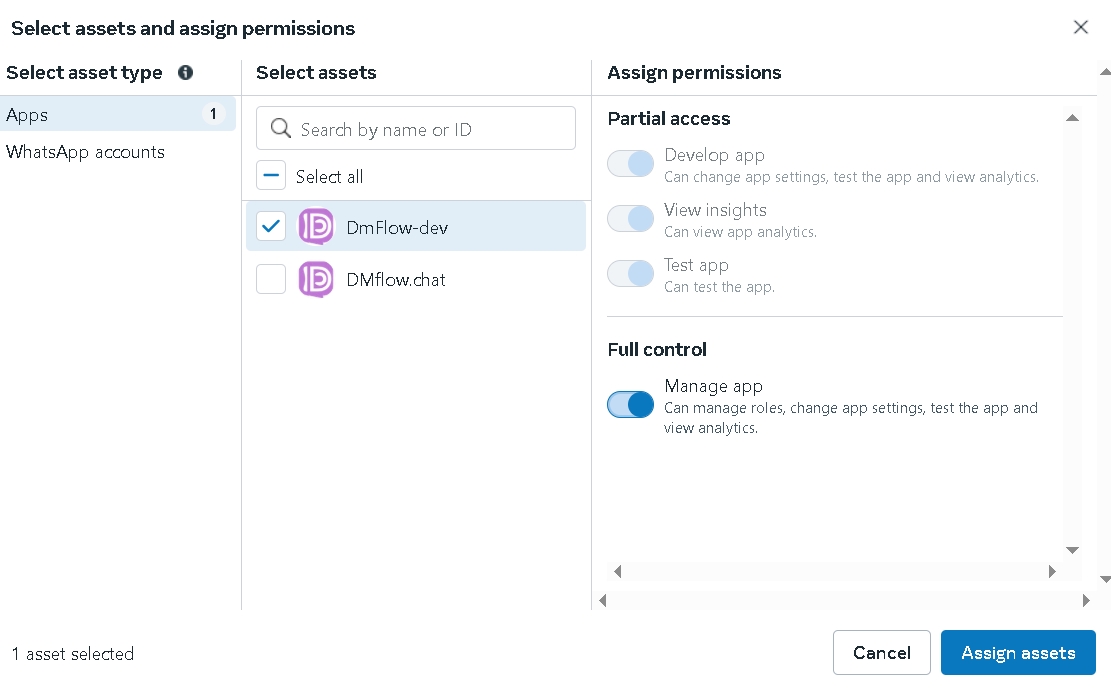
- Click the “Assign assets” button next to the system user.
- In the pop-up window, select “Apps”.
- Find the App created in the first phase.
- Enable Permissions: Turn on the “Manage app” switch under “Full control”. This action is like officially handing over the car keys to this virtual driver.
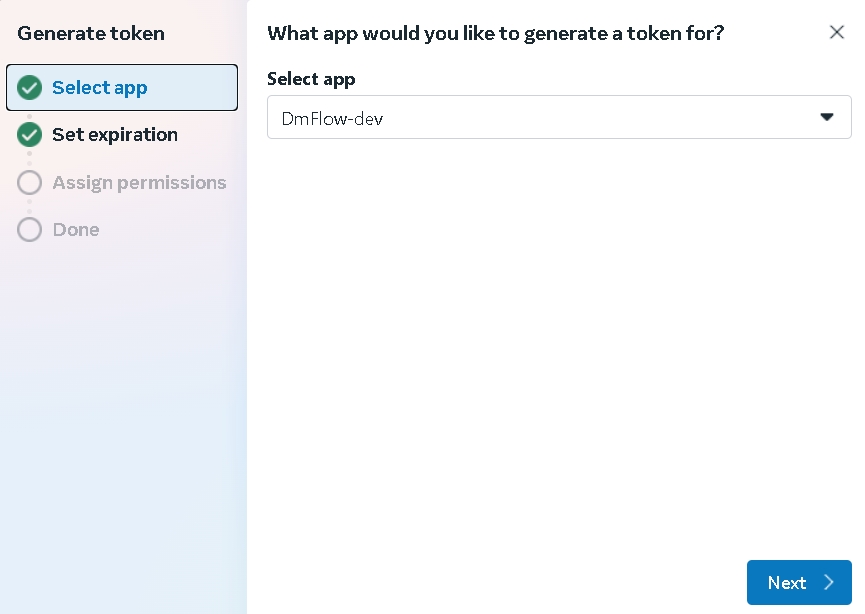
4. Generate Permanent Token
After completing asset assignment, return to the system user page:
- Click “Generate New Token”.
- Select the App just mentioned.
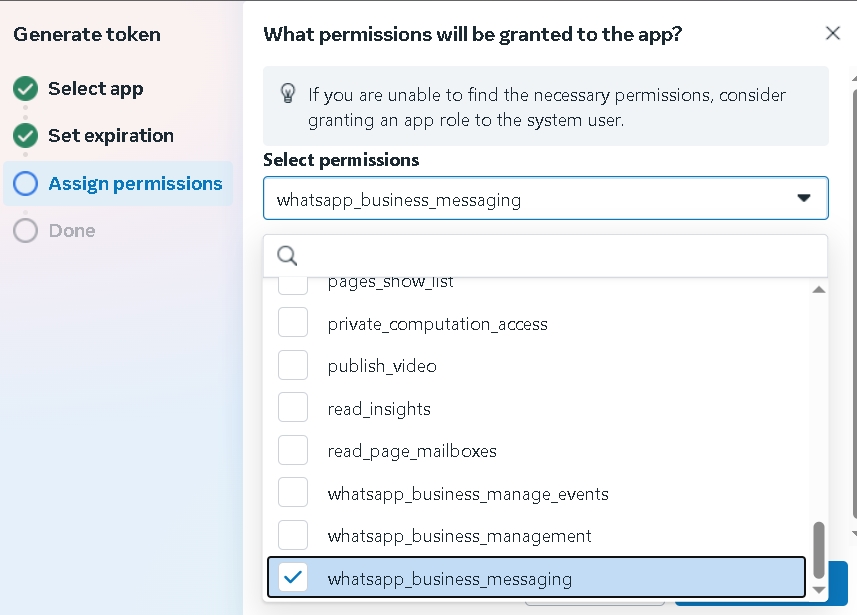
- In the permission list, be sure to check permissions related to
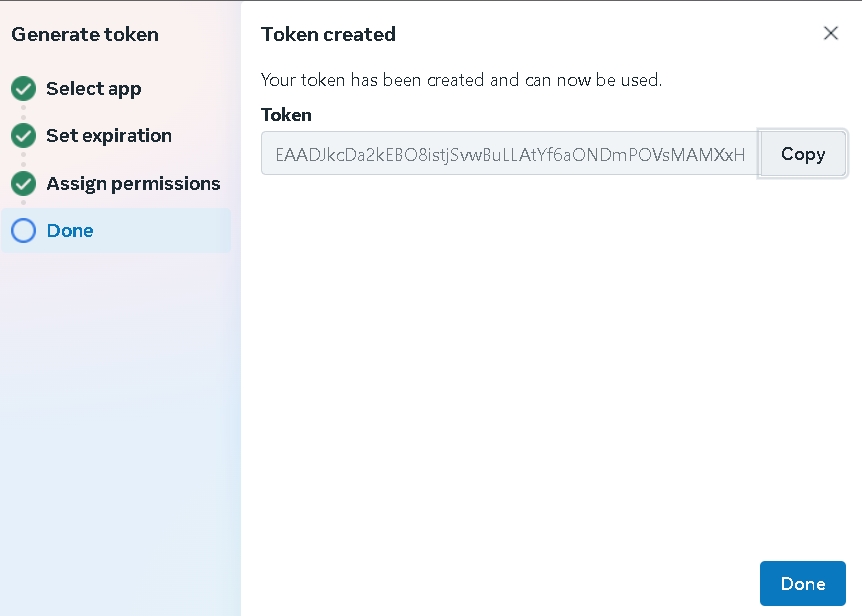
whatsapp_business_messagingandwhatsapp_business_management. - After clicking generate, a long string of garbled characters will appear. This is the Permanent Access Token. Please save it well, because Meta will not show this code again after this window is closed.
Phase 3: Complete Final Integration in dmflow.chat
After getting all the keys and documents, the last step is to return to the dmflow.chat backend and fill these pieces of information into the corresponding positions to complete the final puzzle.
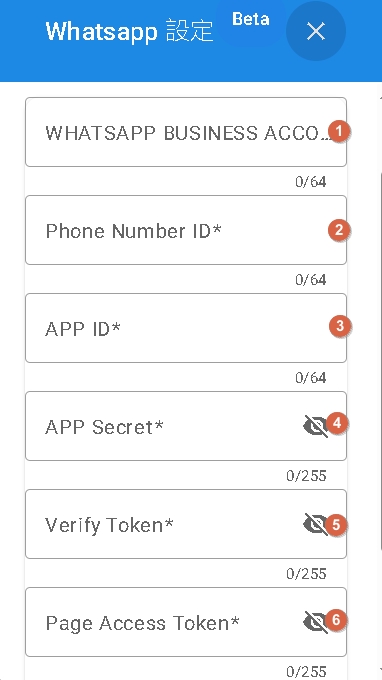
Enter the WhatsApp settings interface of dmflow.chat, you will see several fields, please fill them in according to the following instructions:
- [1] WhatsApp Business Account ID: Fill in the WABA ID recorded in the first phase.
- [2] Phone Number ID: Fill in the Phone Number ID recorded in the first phase.
- [6] Token: Here you must fill in the Permanent Access Token obtained hard in the second phase (never fill in the one that expires in 24 hours).
About Webhook Verification Settings ([3], [4], [5])
To let Meta push messages sent by users to dmflow.chat, both parties need to set up a verification mechanism (Webhook).
- [5] Verify Token: This is a password customized by the user, the more complex the better. You need to set it here, and then go back to the Webhook settings page of the Meta developer backend and fill in the same string.
- [3] and [4]: This usually involves App Secret or specific payload verification settings. This part is mainly used for security checks to ensure that the received data really comes from WhatsApp and not malicious attacks. Please refer to the description about the non-managed part in the Facebook developer documentation and fill in the corresponding keys.
Once filled in and saved, the connection between the two parties is officially established. At this time, messages sent by users on WhatsApp will appear in the dmflow.chat conversation flow in real-time.
Frequently Asked Questions (FAQ)
Q: Why did my bot stop responding after working for a day? This is usually because a “Temporary Access Token” was used. The Token displayed on the homepage of the Meta developer backend only has a 24-hour validity period. Please be sure to refer to the second phase of this article to obtain a permanent token through “System Users” and update it to the dmflow.chat settings.
Q: Can I use my original personal WhatsApp number for integration? Meta has strict regulations on this. It is usually recommended to use a brand new phone number to register for the WhatsApp Business API. If you insist on using an old number, you must first delete the original WhatsApp account of that number (including chat history) before upgrading it to an API dedicated number. Please be sure to backup important data before operation.
Q: After configuration is complete, how to confirm if the connection is successful? The most direct way is to use another WhatsApp account to send a message to the configured business number. If the dmflow.chat backend displays the message, or the bot automatically replies, it means the connection is successful. If there is no response, please prioritize checking if the Webhook Callback URL and Verify Token are set correctly in the Meta backend.
Q: Does this integration method require extra payment to dmflow.chat? The core feature of dmflow.chat is that it does not charge a “toll” for WhatsApp messages themselves. You mainly need to pay the fees charged by Meta officially based on conversation categories (Marketing, Service, Authentication, etc.), and the platform subscription fee of dmflow.chat itself (depending on the plan).
Q: What if I accidentally leak the permanent token? Security is no small matter. If you suspect the token has been leaked, please immediately go to the “System Users” page of the Meta Business Suite, revoke the token (Revoke), and regenerate a new set of tokens. Remember, after generating a new token, you must update the dmflow.chat settings synchronously for the bot to resume operation.

