How to Use DMflow for Web Chat Interaction
Creation at: 2024-12-24 | Last modified at: 2024-12-31 | 3 min read
How to Use DMflow for Web Chat Interaction
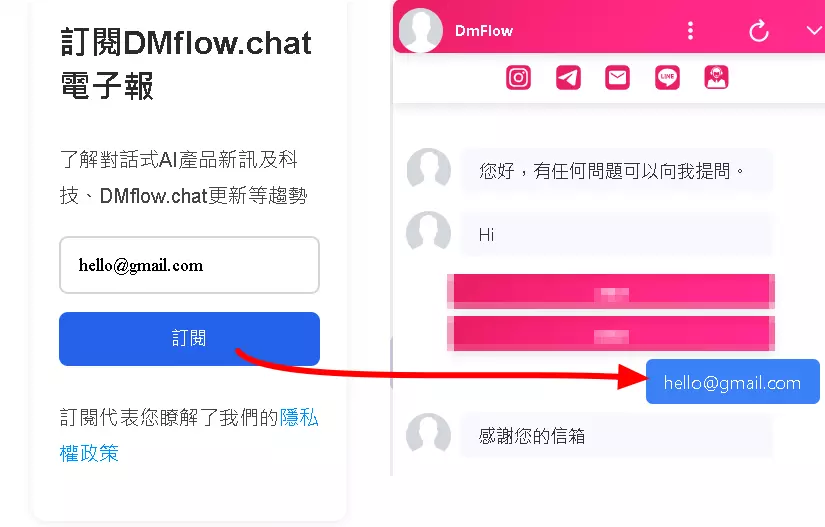
This article focuses on web chat interaction, using the example of newsletter subscription to explain how to use the SDK provided by DMflow to interact with the web chat window.
Basic Concepts
To use DMflow for web chat interaction, you need to first use Chatbot.popupWindow() to open the chat window. Then, you can use Chatbot.sendMessage() to send messages.
Version Requirements
This feature requires DMflow.chat version 0.0.10 or higher. You can check the version with Chatbot.version.
Code Example (Newsletter Subscription)
Here is a JavaScript example for implementing a newsletter subscription feature:
function subscribeEmail(email) {
    if (window.Chatbot) {
        window.Chatbot.popupWindow(); // Open the chat window

        // Send subscription message
        const payload = {
            payload: {
                type: "sleep",
                context: "register_email", // Scene to jump to (e.g., newsletter subscription success/failure)
                params: {
                    "0": email // Pass the email address
                }
            }
        };
        window.Chatbot.sendMessage(JSON.stringify(payload), true, email);
    }
}
Parameter Explanation
paramskeys: You can access the data inparamsusingconversation._params.0or other keys. For example, in the above example, you can useconversation._params.0to get the user’s email address in the DMflow backend.payloadsupported types:type: "sleep": Used to trigger scene transitions in the DMflow backend. Thecontextparameter specifies the scene to jump to, and theparamsparameter is used to pass data to that scene.type: "text": Used to send plain text messages. You can use thequeryparameter to set the text content, e.g.,{ payload: { type: "text", query: "Hello!" } }.
sendMessage()parameters:payload: The data to be sent. It can be an object or a string.postback: A boolean value.true: Indicates thatpayloadis an object, which will be converted to a JSON string before sending.false: Indicates thatpayloadis a string, sent directly.
label: The text displayed in the chat window (displayText). This is usually used to show the user’s input, such as theemailin the above example.
Important Notes
- Must use
popupWindow()first: This is a necessary step.popupWindow()checks if the chat window is already open and opens it if necessary. sendMessage()can only be used after the window is expanded: You can only usesendMessage()to send messages after the chat window is expanded.- Shopping cart and product recommendations: You can use the chatbot to recommend products after users add items to their shopping cart. However, currently, it is not supported to secretly record user behavior (similar to track log) before the chat window is opened. The window must be opened first for interaction.
Additional Notes
- Use
JSON.stringify(payload)to convert a JavaScript object to a JSON string, ensuring the data format is correct. - The
contextparameter is very important in the scene settings of the DMflow backend, as it determines the subsequent flow. - The
labelparameter can enhance user experience by clearly showing whether the user’s input has been sent correctly. - If your form requires authentication, you can use Cloudflare Turnstile, Google reCAPTCHA, or other authentication methods via HTTP resource authentication.
Summary
Through the above explanation, you should have a clearer understanding of how to use DMflow’s SDK for web chat interaction and implement features such as newsletter subscription and shopping cart product recommendations.

