Building Efficient Workflows with Dify AI to Save Time and Costs
Creation at: 2024-11-27 | Last modified at: 2024-12-31 | 3 min read
Building Efficient Workflows with Dify AI to Save Time and Costs
Dify AI is a powerful AI workflow platform that allows you to quickly and easily integrate various tools and services, automating repetitive tasks. Whether it’s data analysis, content generation, or customer service, Dify AI can help you improve work efficiency. With an intuitive interface and drag-and-drop operations, you can easily create your own smart workflows.
Introduction
Dify AI provides an intuitive workflow design interface, combined with API integration capabilities, allowing you to quickly integrate complex operational processes into LINE chatbots, meeting various application scenarios.
Step 1: Register and Choose a Workflow Template
First, go to Dify to register an account and choose the built-in SEO Blog Generator. This step is optional; you can create your own.

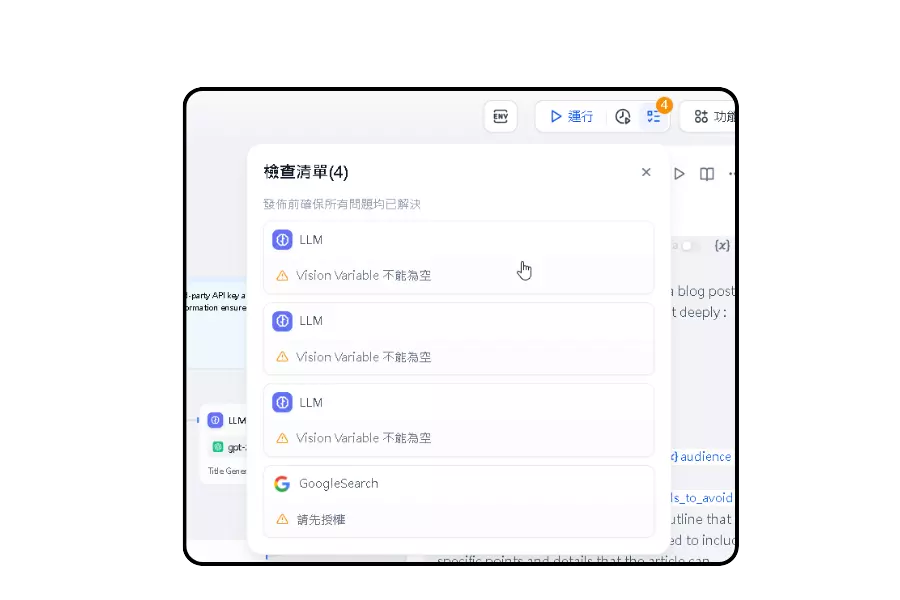
Before publishing the workflow, make sure all nodes are fully set up.
Step 2: Configure Key Parameters
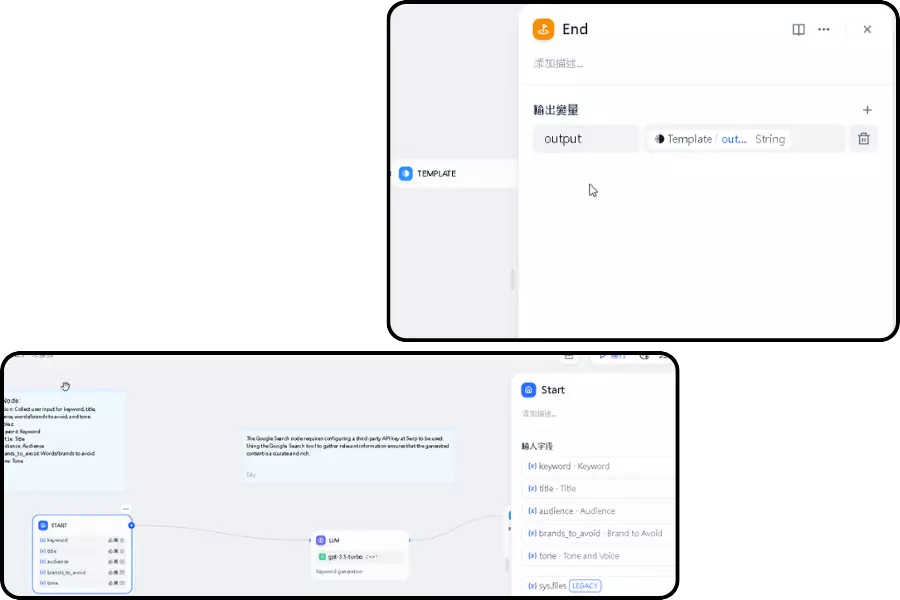
Node Setup
Start Node Setup
- Keyword: Search keyword
- Title: Article title
- Audience: Target readers
- Brands to avoid: Brands to avoid mentioning
- Tone: Tone style
End Node Setup
- Output: Final output content
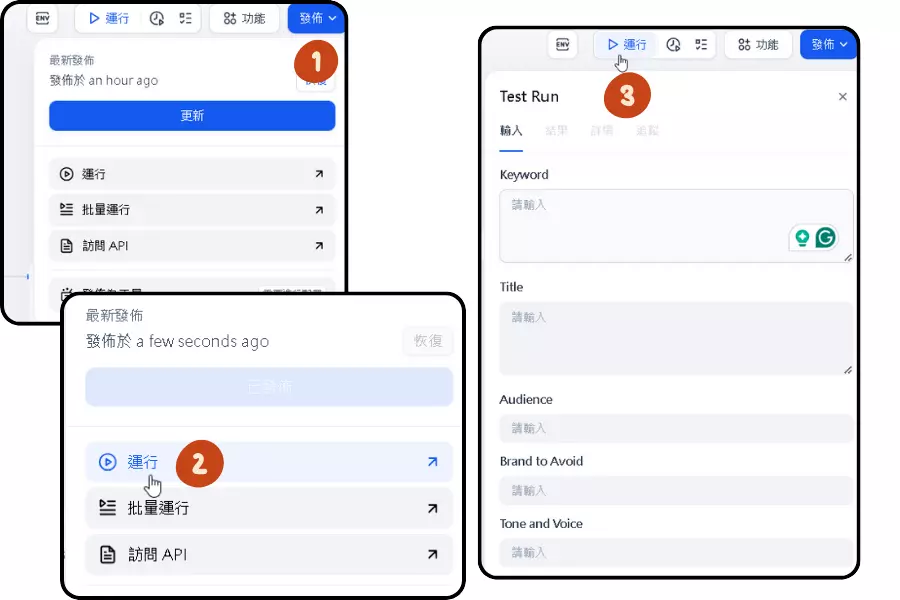
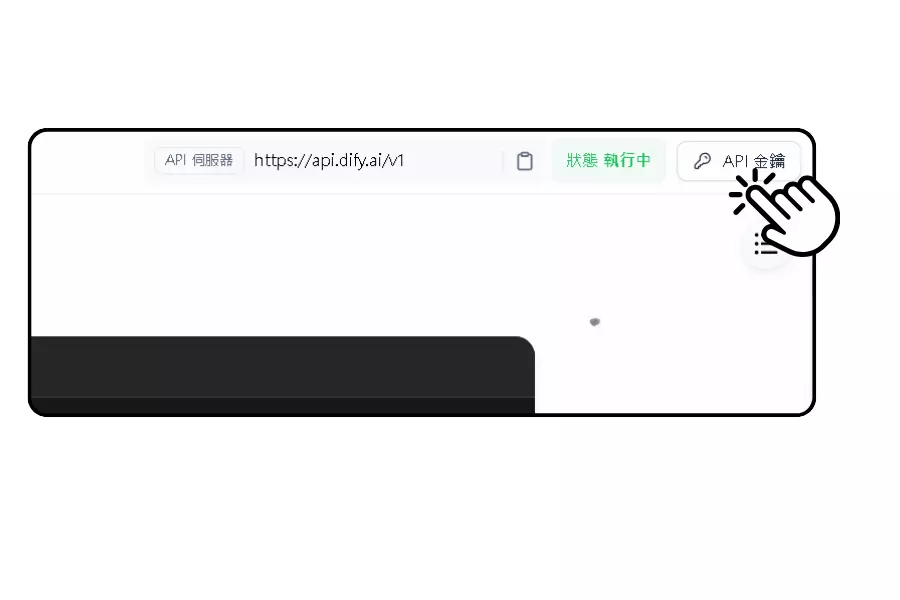
Step 3: Run and Set Up API Key
After clicking publish, you can immediately run the workflow to test the output content.
Create API Key
Go to Workflow App API to generate an API key for integration.
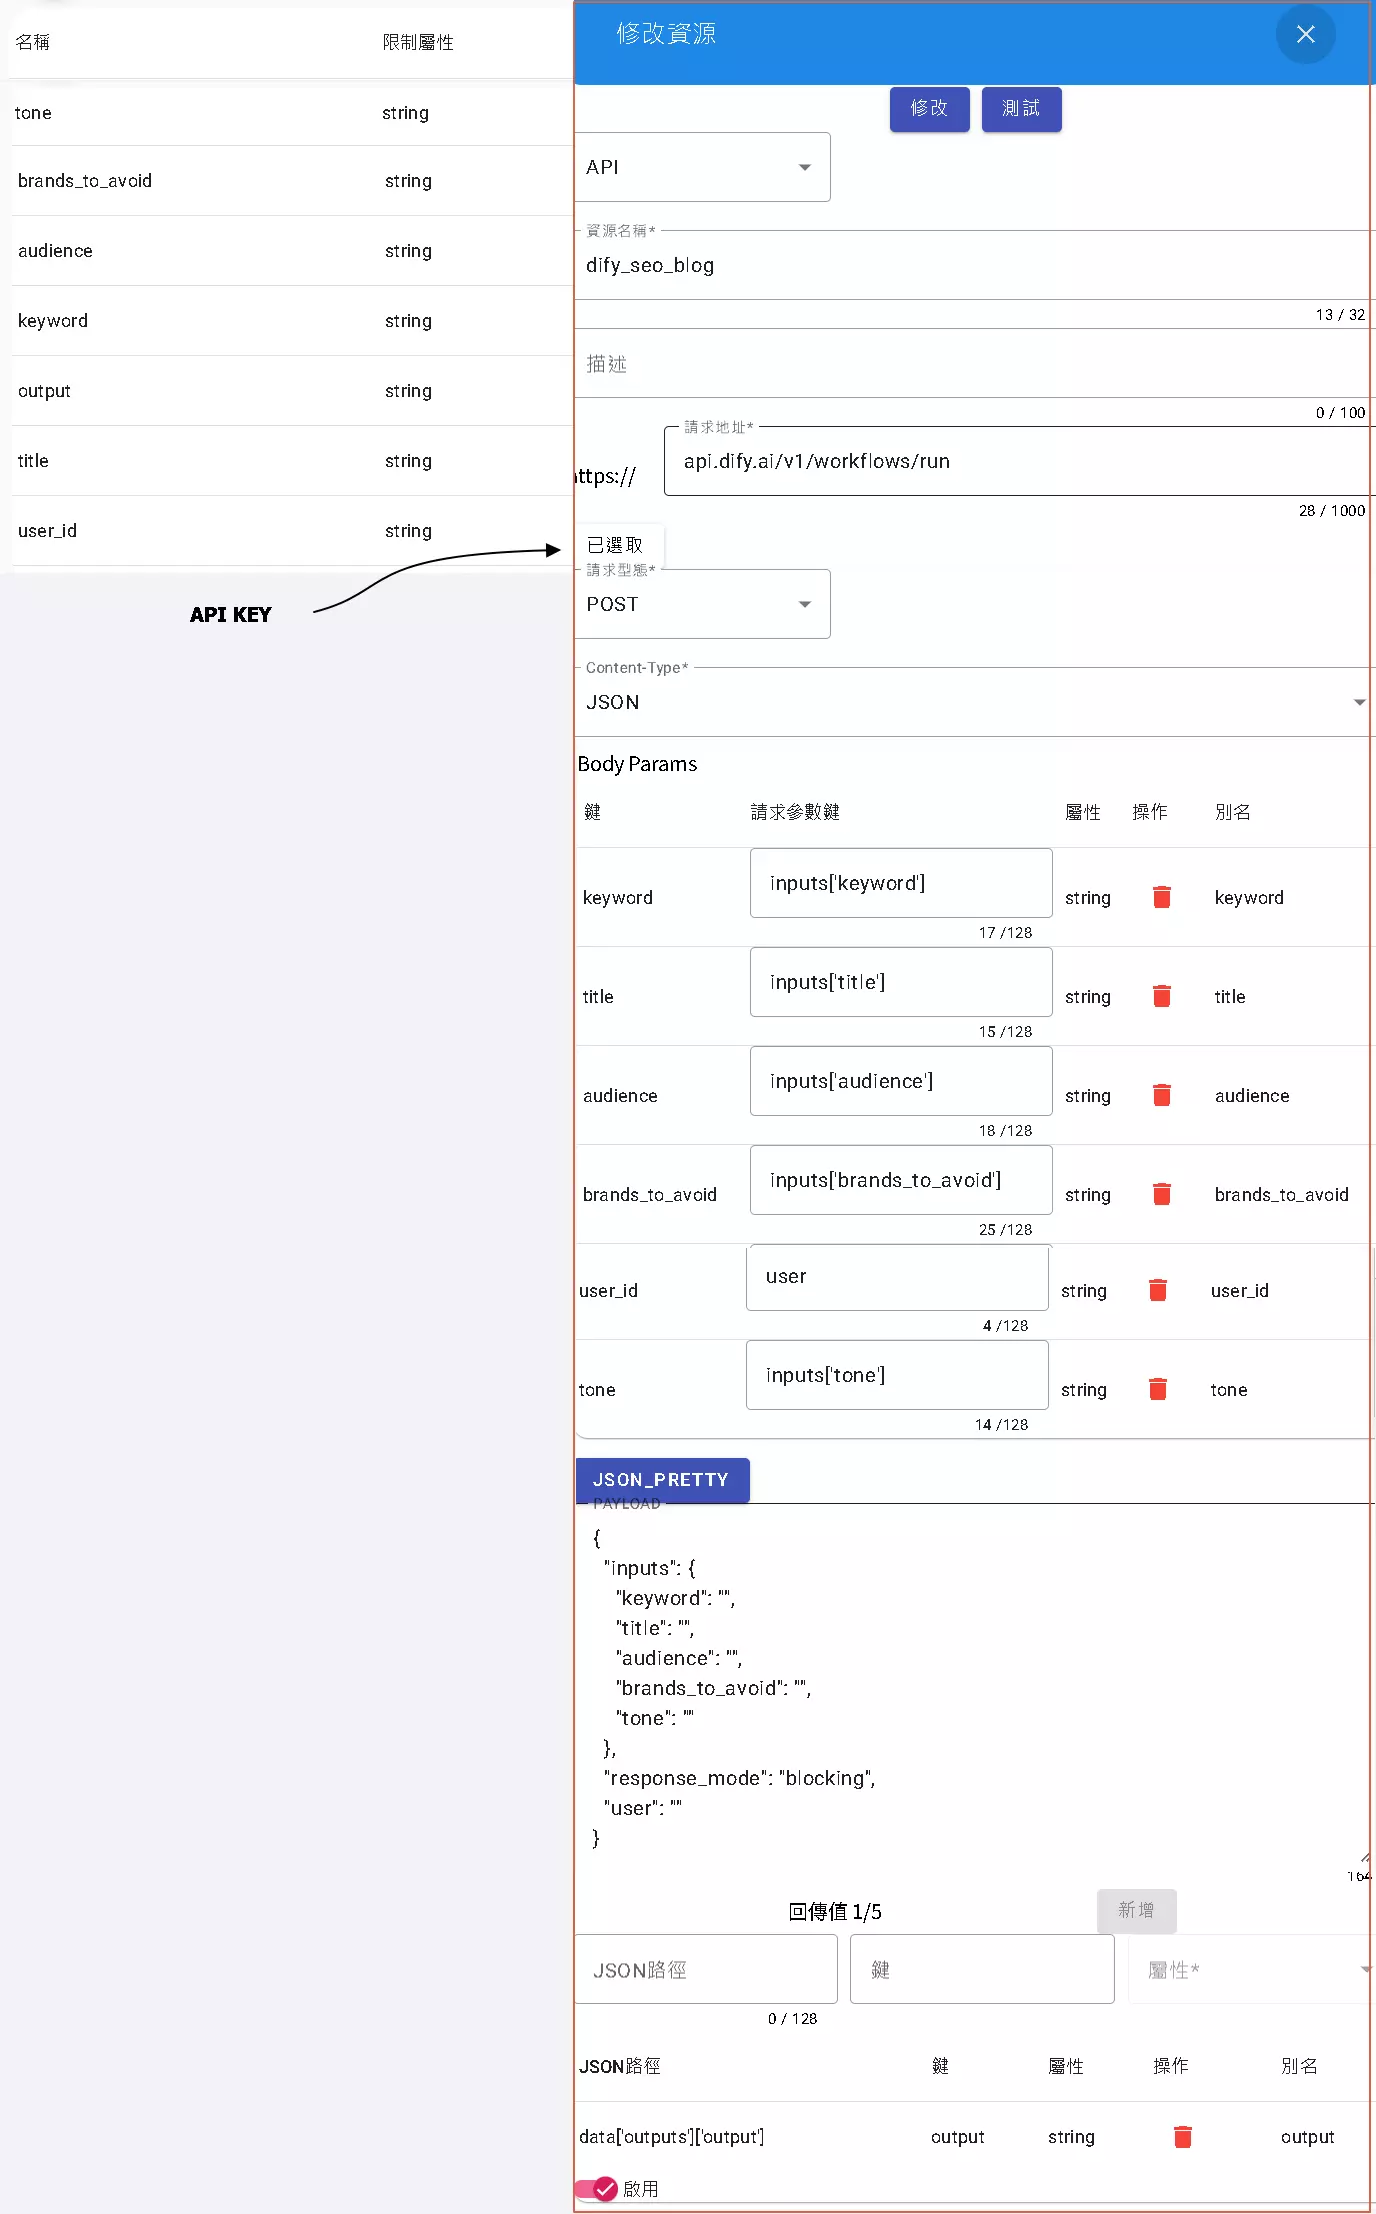
Example settings:
- URL:
https://api.dify.ai/v1/workflows/run - Method: POST
- Header:
Authorization: Bearer {API_KEY} - Payload:
{
  "inputs": {
    "keyword": "SEO marketing",
    "title": "SEO Marketing Strategy Guide for Beginners",
    "audience": "Startup owners",
    "brands_to_avoid": "Google, Bing",
    "tone": "Professional but easy to understand"
  },
  "response_mode": "blocking",
  "user": "{unique_user_id}"
}
Response (focus on the output parameter within outputs),
{
  "workflow_run_id": "djflajgkldjgd",
  "task_id": "9da23599-e713-473b-982c-4328d4f5c78a",
  "data": {
      "id": "fdlsjfjejkghjda",
      "workflow_id": "fldjaslkfjlsda",
      "status": "succeeded",
      "outputs": {
        "output": "{output}"
      },
      "error": null,
      "elapsed_time": 0.875,
      "total_tokens": 3562,
      "total_steps": 8,
      "created_at": 1705407629,
      "finished_at": 1727807631
  }
}
Step 4: Set Up Resources in dmflow
In the dmflow.chat platform, set up resource nodes and corresponding variables to achieve seamless integration with LINE chatbots.
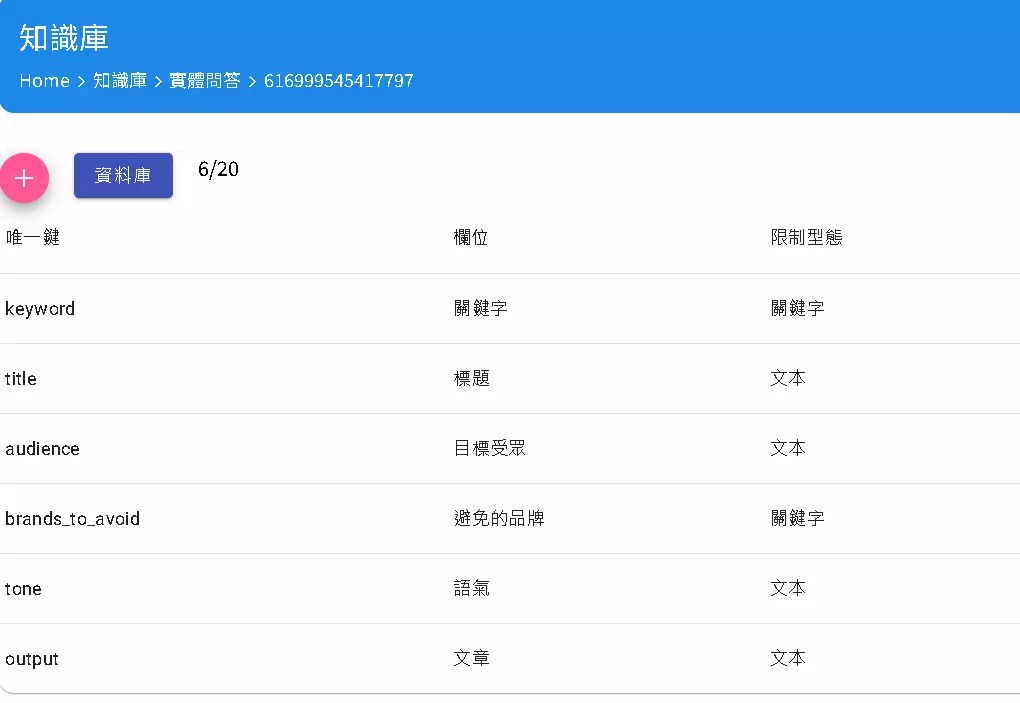
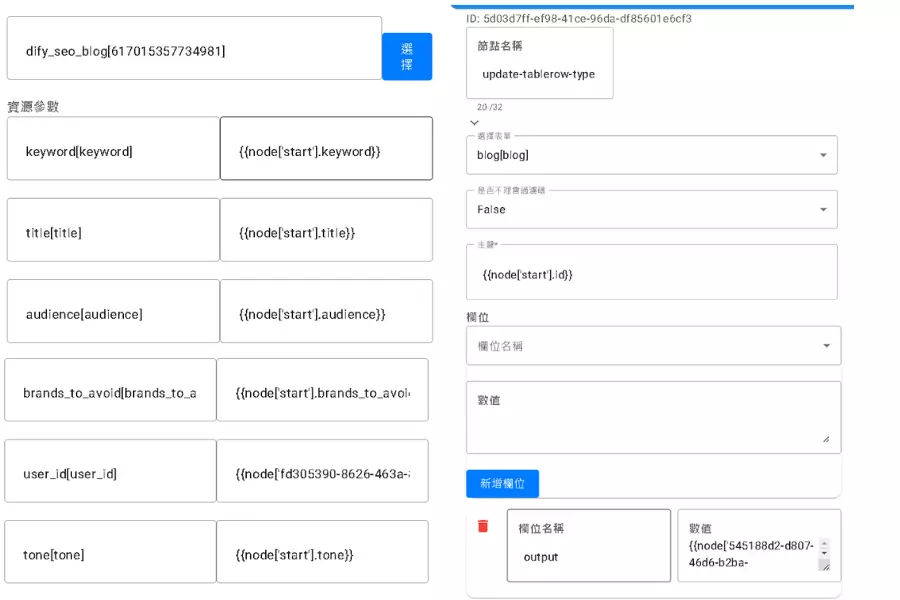
Variable Node Setup
Add the following seven key variables:
- user_id: User’s ID.
- title: Title.
- keyword: Keyword.
- tone: Tone.
- audience: Target audience.
- brands_to_avoid: Brands to avoid.
- output: Final workflow output content.
Refer to the image on the right for resource setup.
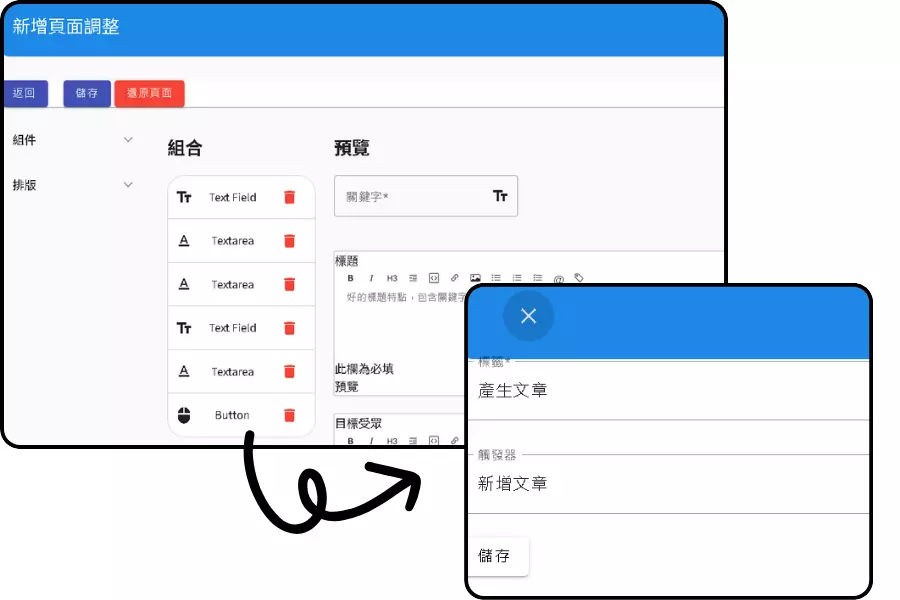
Step 5: Create an Article Form

Select the input variables created above:
- user_id
- title
- keyword
- tone
- audience
- brands_to_avoid
And add the output variable:
- output
Step 6: Create a Trigger
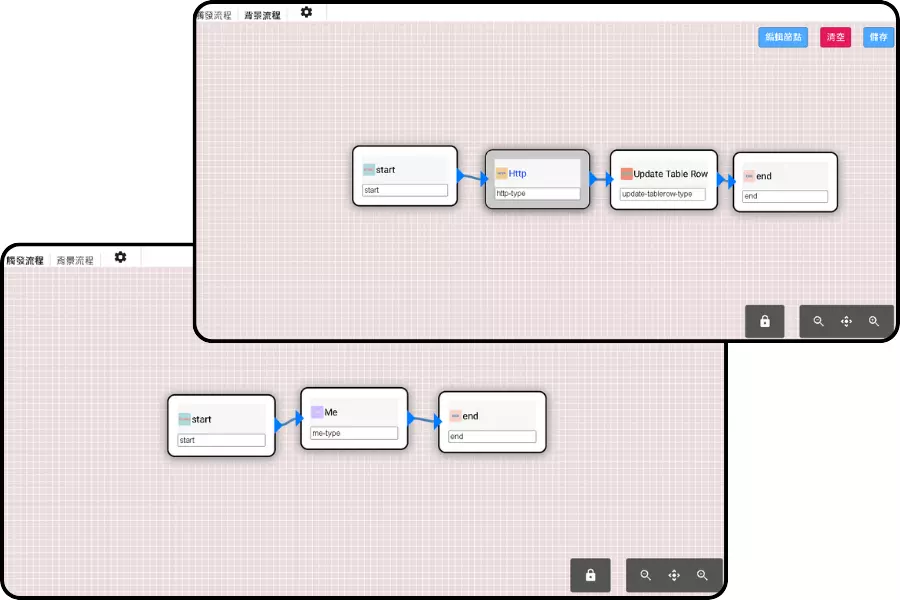
Set up the background resource node and update the form.
Step 7: Generate Articles
First, set up the new page to adjust, making sure to remove the output field and add the button’s trigger ID.
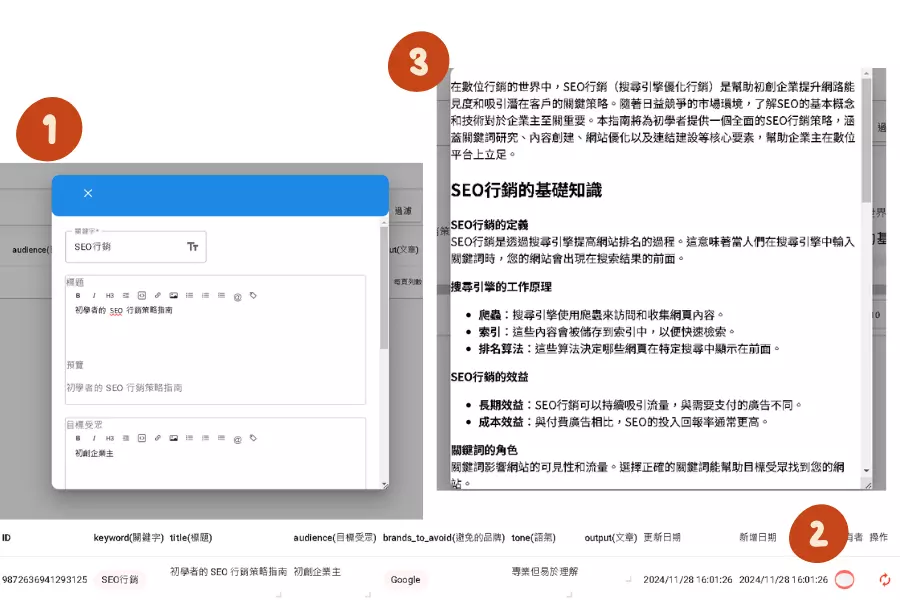
Finally, generate articles in three steps:
- Click on the new list, enter the title, keyword, tone, audience, and brands_to_avoid you want to generate. The userId is currently only returned to Dify because the new list automatically binds the creator.
- When you are the owner, wait for the refresh prompt to appear. The list on the right will turn red when refreshed. Click to refresh the selected list.
- Generate the article.
Conclusion
-
- This example provides a way to create workflows with Dify.
-
- How to integrate Dify through dmflow, directly creating form fields and binding one to multiple owners.
- How to Use Dify AI Reference
- Complete Guide to Using Dify AI to Integrate LINE Chatbots

